

Step-by-Step Guide: How to Clean a Can Opener the Right Way

“Proud Homemaker is part of several affiliate marketing programs, so we may earn commissions on products selected and purchased through our retailer links.”
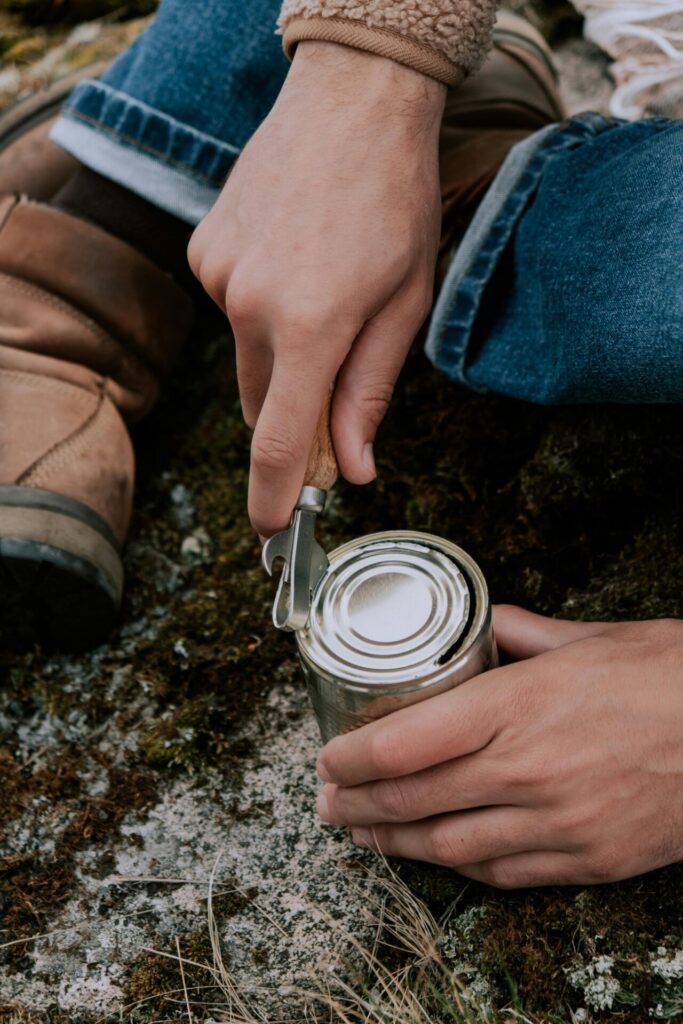
Let me be honest—cleaning a can opener was never on my regular to-do list. I mean, it just opens cans, right? How dirty could it really get? Turns out… very. One day, while prepping dinner, I caught a glimpse of the grime lurking around the blade of my trusty manual can opener, and it stopped me in my tracks. Yikes. That’s when I realized this unsung kitchen hero needed some serious love. So, I went all in—manual, electric, even a rusty one I nearly tossed out. If your can opener’s been silently suffering too, here’s your full guide to cleaning it the right way.
Read: Hidden Places You Always Forget to Clean.
Why Bother Cleaning Your Can Opener?
Before we dive in, let me quickly tell you why it’s worth your time. Over time, bits of food, especially from canned beans, tomato sauce, or tuna, get trapped around the blade. This buildup not only affects performance but also becomes a breeding ground for bacteria. Left untouched, it can dull the blade, cause rust, and even make your food taste off. Cleaning it isn’t just about hygiene—it’s about keeping your tool functional and long-lasting.
Read also: Effective methods for cleaning kitchen towels
How to Clean a Manual Can Opener
So let’s start with the good old manual can opener. Whether yours is a handheld one with a turning crank or the kind with a gear mechanism, they all need the same TLC. Here’s how I tackled mine:
What You’ll Need:
- Warm water
- Dish soap
- An old toothbrush or a small brush
- White vinegar (optional)
- Baking soda (for tough grime)
- A towel for drying
- Cotton swab or toothpick
Step-by-Step Cleaning Process:
Step 1: Soak the Can Opener
I began by soaking my can opener in warm, soapy water for about 5–10 minutes. This helped loosen dried food particles and grease.
Step 2: Scrub the Blades and Gears
Next, I used an old toothbrush to scrub every nook and cranny, especially the gear that rotates the blade. You’ll be amazed at how much gunk can hide in those crevices. If there’s stuck-on food, a paste made of baking soda and water helps lift it right off.
Step 3: Use a Toothpick or Cotton Swab
Some spots were too tight for a brush, so I used a toothpick to dislodge stubborn bits near the blade and handle joint. Cotton swabs dipped in vinegar are great for cleaning small gaps, too.
Step 4: Rinse Thoroughly
After scrubbing, rinse your can opener well under warm running water. Make sure no soap or debris is left behind.
Step 5: Dry Completely
This step is crucial! Moisture is what causes rust. I patted mine dry with a towel and left it out to air-dry for a bit.
Optional: Lubricate the Gears
If your can opener feels stiff after cleaning, a drop of food-safe mineral oil on the gears makes it work like new again.
Read: How To Get Rid Of Fruit Flies From Home Right Away
How to Clean an Electric Can Opener
Electric can openers are fantastic—until you realize they also need cleaning. I had one I hadn’t touched in months, and when I popped the cutting mechanism off… yeah, it wasn’t pretty.
What You’ll Need:
- Damp cloth or sponge
- Mild dish soap
- Toothbrush or cotton swabs
- White vinegar
- A towel for drying
Step-by-Step Cleaning Process:
Step 1: Unplug the Device
Always start by unplugging the can opener to avoid any accidents. Safety first!
Step 2: Remove the Blade or Cutting Assembly
Most electric models have a removable cutting wheel or assembly. I gently popped mine out and soaked it in warm, soapy water.
Step 3: Scrub the Removable Parts
Using a toothbrush and some soap, I scrubbed the blade, focusing on any caked-on food or residue. Vinegar helped with sticky or greasy buildup.
Read also: Effective Way To Clean Oven Rack
Step 4: Wipe Down the Body
For the main unit, I didn’t soak it. Instead, I used a damp cloth with a bit of soap to wipe down the exterior. Don’t forget the area around where the blade attaches—it often hides hidden grime.
Step 5: Dry and Reassemble
After everything was clean and dry, I reassembled the parts and gave the opener a quick test. It worked smoother and looked way less gross.
How to Remove Rust from a Can Opener
Now, let’s talk about rust. I almost threw away one of my older can openers because of some light rusting—but I’m so glad I didn’t. With the right method, rust doesn’t stand a chance.
What You’ll Need:
- White vinegar
- Baking soda
- Lemon (optional)
- Scrubbing pad or steel wool (gentle grade)
- Toothbrush
- Towel
Step-by-Step Rust Removal Process:
Step 1: Soak in Vinegar
I filled a bowl with white vinegar and let the rusty parts of the opener soak for a few hours. If your opener isn’t fully metal, just soak the affected area using a cloth soaked in vinegar.
Step 2: Scrub the Rust
After soaking, the rust started to loosen. I used a scrubbing pad and toothbrush to gently lift it away. For tougher spots, I made a paste with baking soda and lemon juice—it fizzed up and worked wonders!
Step 3: Rinse and Dry
I rinsed the opener under warm water and made sure it was completely dry. Rust loves moisture, so don’t skip this part.
Step 4: Prevent Future Rust
Finally, I rubbed a light coat of mineral oil on the blade and gears. This adds a protective layer and keeps rust from forming again.
Extra Detailed Points to Add
1. Quick Daily Cleaning Hack
If you use your can opener often, a full wash every single time isn’t necessary. A quick wipe-down with a damp cloth or a paper towel right after use prevents food from drying and sticking to the blade. This way, deep cleaning becomes easier.
2. Sanitizing for Extra Safety
After washing, you can dip the blade and gears in a solution of 1 part white vinegar and 3 parts water for a minute. This kills bacteria and prevents odor—especially useful if you open cans of tuna, beans, or pet food.
3. Dealing With Sticky Residues
Canned syrups (like pineapple or peaches) leave behind a sugary, sticky film that soap alone doesn’t always cut. Rubbing alcohol on a cotton ball works well for breaking down sticky buildup before washing.
4. Dishwasher Safe or Not?
Some modern manual and electric can openers have removable parts that are dishwasher safe. Always check the manufacturer’s instructions. Tossing non-safe parts in the dishwasher can damage the gears or dull the blade.
5. Signs You Need a Replacement
Even with regular cleaning, can openers don’t last forever. If the blade is too dull, the gears skip while turning, or rust keeps returning despite maintenance, it’s time to replace your opener for food safety.
6. Storing Your Can Opener the Right Way
Avoid leaving your opener in a damp sink or drawer. Store it in a dry, upright position (a utensil holder works well). If you live in a humid area, add a silica gel packet in your kitchen drawer to fight moisture.
7. Pet Food Can Openers
If you use a separate opener for pet food, clean it just as thoroughly as your main one. Pet food residue can smell stronger and harden faster than regular food, leading to faster rusting.
Read also: Easy homemade window cleaner
Final Thoughts: Clean Tool, Happy Kitchen
After going through this entire deep-cleaning process, I honestly felt so much better using my can openers. They looked newer, worked better, and most importantly, I knew they weren’t harboring old food and bacteria. Now, I make it a point to give them a quick clean every week and a deep clean once a month.
So if you’ve been ignoring your can opener (like I did), consider this your friendly nudge to give it some well-deserved attention. Trust me—your future self (and your canned goods) will thank you!
Tip to Remember:
Always dry your can opener completely and store it in a dry place. It only takes a little moisture to start rust or dull your blades.
Read also: Make Your Walls Spotless
Frequently Asked Questions (FAQ)
Q1: How often should I clean my can opener?
If you use it daily, do a quick clean after every use and a deep clean once a week. For occasional use, deep cleaning once a month is enough.
Q2: Can I put my manual can opener in the dishwasher?
Not always. Most manual can openers are not dishwasher safe because high heat and moisture can cause rust and dull the blade. Always check your model’s instructions.
Q3: What’s the fastest way to clean a can opener?
Wipe it down with a damp cloth immediately after use, focusing on the blade. This prevents dried-on food and makes future deep cleaning easier.
Q4: Why does my can opener smell bad?
Odors usually come from trapped food particles, especially from fish or beans. A vinegar soak followed by thorough drying usually removes smells completely.
Q5: How do I keep my can opener from rusting?
Always dry it fully after washing, store it in a dry place, and occasionally rub a small amount of food-safe mineral oil on the gears and blade.
Q6: My can opener skips when turning—what’s wrong?
It could be due to dull blades, food buildup in the gears, or rust. Clean it thoroughly, oil the gears, and if it still doesn’t work smoothly, it might be time for a replacement.
Q7: Can I use olive oil instead of mineral oil to lubricate my can opener?
No. Olive oil or other cooking oils can go rancid and attract bacteria. Stick to food-safe mineral oil, which doesn’t spoil.
Was this article helpful? We’d love to hear your feedback, ideas, or any blog post requests you have—drop them in the comments below!


4 Comments